Lighting holds immense power. It provides the ability to go about our days before sunrise and after sunset. It creates certain moods and atmospheres. It can completely change how things look.
Download 2022 LED Lighting Specification Charts
In landscape lighting, the difference between a good and bad installation can be night and day.
“It doesn’t matter how pretty a fixture is, it’s what goes on the inside that matters,” says Tom Garber, president of EmeryAllen LLC, Mt. Pleasant, South Carolina. “Using the correct lamp and understanding lighting can take years of experience.”
But for those contractors just starting their journey into landscape lighting, professionals provide their advice on how to elevate lighting installations into eye-catching, meaningful and safety-providing designs.
Assess the situation
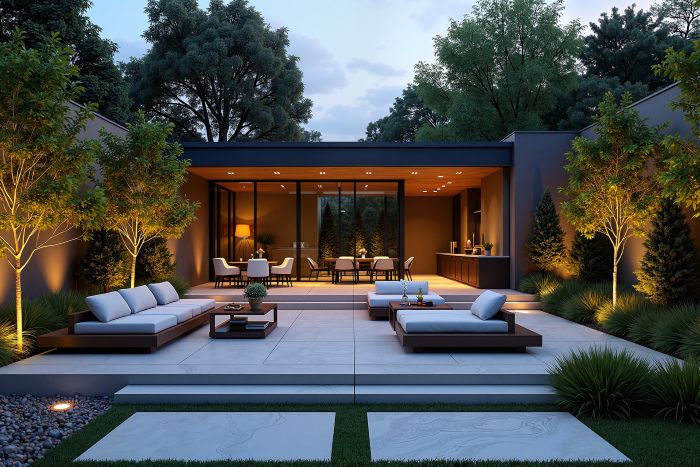
There are numerous aspects that go into good landscape lighting design. The most important part and first place to start is for a contractor to get to the root of the project, says Kevin Smith, national technical support and trainer at Brilliance LED, Phoenix.
 “Lighting is subjective,” Smith says. “What you like in lighting will be different from others.”
Smith advises contractors ask clients “Why light?” Dig into the purpose behind the lighting job. Is it to provide security, beauty or a marriage of both? Find out how a client is going to use the area and what mood or effect they want the space to have.
“That will lead you to create a design and specify the right lamp style, wattage and color that fits the customer’s needs and wants,” Smith says.
Break down design
Once the contractor understands the client’s goals, it’s time to devise how they can meet them in the design process. Thinking about the client’s vision, a contractor needs to decide the illumination level and type needed to create it, says Tom Kuenzi, technical service representative for Unique Lighting Systems, Riverside, California.
“It all depends on what you’re lighting and what the desired effect is,” says Kuenzi, “Focal points are bright; walkways and sitting areas can be dim.”
Average uplighting of trees and homes requires 5-13 watts of power, Kuenzi adds. Average path lighting, area lighting and step lighting need about 2 watts of power, but this depends on the LED manufacturer.
“Find a quality manufacturer and stick with them, getting used to their product line, color temp and illumination output,” Kuenzi says.
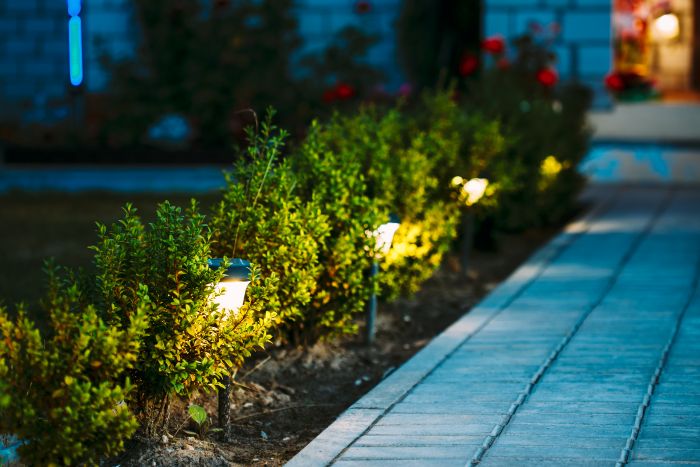
Contractors also need to decide what lighting techniques they need to fashion the intended effect, like washing, grazing, uplighting, downlighting and accent lighting.
 Both washing and accent lighting will require fixtures with softer or lower wattage and typically wider beam angles, says Evan Kruk, marketing manager for AMP Lighting, Lutz, Florida. Highlighting areas will require a more focused or tighter beam, and in some cases, higher wattage.
For directional lamps, areas that need more light coverage may need a larger lamp type and fixture like a PAR36 lamp. For tight areas and smaller objects, Kruk emphasizes using a smaller lamp and fixture such as an MR11 lamp. The MR16 is one of the most commonly used lamps for uplighting.
For most home illumination, Kruk says he sees lighting designers choosing lamps that provide around 300 lumens for one-story homes and lamps that provide around 400-500 lumens for a full two-story or greater home. The most commonly used beam angles for directional lamps are 35-60 degrees.
“A variety of different beam angles can be used in order to illuminate a home evenly and consistently,” Kruk says.
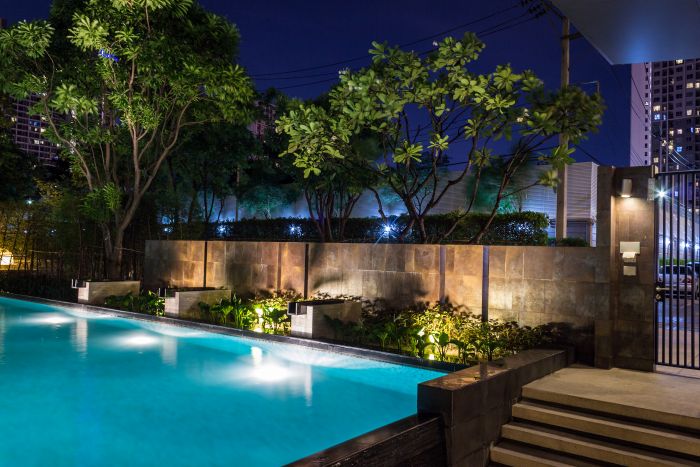
Todd Goers, national sales manager of WAC Landscape Lighting, Port Washington, New York, reminds contractors to also take into account a space’s ambient light, plant thickness and the object’s natural color.
“(They) all play a role in determining brightness level, Kelvin temperature selection and beam angle,” Goers says.
Advice for beginners
When designing landscape lighting, Kruk says he frequently witnesses contractors opt for the brightest lamps possible to solve any coverage issues. However, this can actually make a landscape and home look flat, create unattractive shadowing and hotspots, and wash out the detail intended to be enhanced.
“Instead, use more fixtures with less intensity to add more depth and character to your landscape and home,” Kruk says. “This may mean repositioning fixtures to accommodate the change in coverage.”
Assuming that a lot of light is necessary for good landscape lighting design is a major mistake.
“Less is best,” says Garber.
Another commonly made mistake is that newer contractors fail to consider glare from the primary viewing angle, says Goers.
“As the saying goes, ‘You want to showcase the effect of the light and not the light source itself,’” says Goers.
Goers also emphasizes the importance of selecting the proper color and Kelvin temperature of fixtures on a project. Contractors should be mindful that objects look very different at 2,700K, 4,000K and 5,000K.
 “A newer contractor may want to make the scene look like it does during daylight, but this is generally a poor idea,” Goers says. “Landscape lighting should enhance the landscape.”
When it comes to deciding on the right color temperature on surfaces being lit, Kuenzi emphasizes contractors turn to the color of the home and plant materials.
“A modern home with a lot of gray, white or stainless surfaces can look dingy or have an orange tint to them when using a warm white 2,700K LED,” Kuenzi says. “In this case a white LED 3,000K would be best.”
Alternatively, a warm-colored home with earth tones of tan, brown, yellow and even some warmer white may be better suited for a warm white 2,700K LED, says Kuenzi.
When it comes to lighting any greenery, “Most plant material should have a true, untinted color. Greens are green. Reds are red. Yellow is yellow,” Kuenzi says. “These are best suited to a pure white LED from 3,000K to 5,000K in color temp.”
Kruk urges contractors to avoid selecting color temperatures that clash with existing lights, which can create an imbalance and stand out from one another.
“Selecting a color temperature that matches throughout the entire landscaping and home is important and will typically only vary in outdoor dining areas or seating areas,” Kruk says.
He provides an example of successful varied temperatures in one space of using warm colors for landscape lighting with some cooler lighting for moonlighting in areas. Or, cooler color temperatures for landscape lighting, but warmer, amber colors for outdoor dining and intimate areas.
Smith’s greatest piece of landscape lighting advice for new contractors is to always be aware of ambient light sources. He suggests contractors drive by a client’s home at night prior to the appointment to take note of any streetlights, coach lights or wall packs that could interfere with their design.
“Keep in mind that rural areas are very dark,” says Smith. “In these situations, a little bit of light can go a long way, so don’t overdo it.
“Every job is going to be different in some ways, so try ordering lamps separately from fixtures. This gives you the flexibility to try different options and find what works best.”
Practice makes perfect
Knowing how to design and install good landscape lighting is an art in itself, taking years for landscape lighting professionals to master. For contractors just spreading their lighting wings, Garber encourages they find a mentor, join industry associations like the Association of Outdoor Lighting Professionals, attend events and speak with manufacturers willing to teach them how landscape lighting works.
To Smith, expertise in landscape lighting is all about experience.
He urges new contractors perform night demonstrations to learn how beam angles and Kelvin temperatures work. Study the photometric charts of the manufacturer’s lamps to understand how light will be displayed on different subjects. Study natural effects like downlighting, backlighting and mirror lighting with different lamps, and practice with uplighting as well. Test lamps on different plant material and architecture. Even test out colored lamps, as “Sometimes a little touch of color can add a conversation piece to a project.”
“The old adage is practice makes perfect,” Smith says.
Download 2022 LED Lighting Specification Charts